Friday, January 29, 2010
Make Your Own Valentines
Classmate Valentines
Crafty Moms, School Teachers, Anyone who wants to make your own Valentine
Mom-Stuff has a NEW selection of original fun and easy Valentines!!!
Let your child choose the valentine he/she wants to make and give to their classmates at school. Keep in mind your child’s skill level. The Bee, Lady Bug and Butterfly are the easiest. While the Monkey and Lion are more difficult. They have small pieces to cut and glue. The patterns are made for 8 x 10 card stock sheets of paper. If you use scrapbook paper you will need to cut it to size.
After choosing the Valentine your child wants to make click on the link for instructions. Here you will find your materials list and the links for the patterns. Don’t try to make all of the animals unless you have a lot of time. If you keep it to one or two making these will be fun, fast and easy.
Printing instruction: On the pattern page double click on printer friendly button. When the pattern pulls up left click the mouse and right click on print picture.
I use boxes of candy hearts but you can use other candy. These Valentines look cute without the candy if you do not want to give candy to the kids.
Go to Make You Own Valentines at www.mom-stuff.com for patterns and instructions.
Mom-Stuff your mom’s resource site, has lots of Valentine Crafts. Visit and find something fun to make and give this Valentine’s Day
Thursday, January 28, 2010
Tooth Fairy Pillow
I believe in the tooth fairy
I believe in the Easter bunny
I believe in Santa, too
My Grand daughter ask me this year, "Grandma do you believe in Santa Clause?" I replied without hesitation "Yes Kaylee I do believe."
I believe in all things good. You might ask how the tooth fairy, the Easter bunny and Santa are good. In my experience they teach us at a very young age to believe in things we cannot see, touch or smell. They can lay the foundation for believing in greater unseen things as we mature. They help children to believe in their dreams. They help children to have faith in things they can not see.As we realize that the tooth fairy, the Easter bunny and Santa are not as we perceived them, we are old enough to learn that their gifts were real and that the love they were given with was also real. By this time we have learned much more about life, relationships and values. If you believe, make someone special a tooth pillow to leave out for the tooth fairy. Help them to believe in their dreams.
Get your instructions and pattern at mom-stuff http://www.mom-stuff.com/public/207.cfm
Monday, January 18, 2010
Valentine for Boys
I want to thank Mom-Stuff.com for featuring my blog on their Mom-Stuff Blog Tour. I have had a lot of fun working with them. This is a great resource for moms. Visit them by clicking on the mom-stuff banner on my site.
Valentine for Boys idea came from Family Fun.com
I never "tire" of your friendship.
This Valentine Card is so easy kids can do it all by their selves.
Materials:
White craft foam-one page
Brown acrylic paint
Paper plate
Red marker
Glue
Toy car
Scissors
Instructions:
Cut page of foam in half
With the red marker write on the text
Put some brown paint onto a paper plate.
Let the child run the can through the paint and onto the foam making a road.
Let dry and help your child sign the card.
Glue a toy car onto the card.
(You can use a candy car or cut a car, truck or bus from the Going Places Cricket Cartage)
Other sayings for this card:
I'm wheely for you!
To a wheely good friend.
Saturday, January 16, 2010
Love Bug Suvkers
Materials:
Heart suckers
Goggle eyes
Red ridden
White and pink craft foam
Red glitter craft foam
Small white pompons
Red and white glider pompons
White, red and pink
Low heat glue gun
Low heat glue
Scissors, and
Red pipe cleaner
Instructions:
The first thing that I did was cut hearts out of the craft foam. Cut 2 bigger hearts out of the white or pink. Use your suckers as a pattern to cut the hearts. Cut out 2 smaller hearts that will be glued onto the bigger hearts. I traced the hearts on to the craft foam and I let me son cut out all of the hearts. If your kids are old enough they love to do this part.
Then I had my son glue the smaller heart to the bigger hearts. We glued the hearts to the suckers, one on both sides of the sucker. To make the face I glued on the goggle eyes and a small pompon as the nose. I had me son twist the pipe cleaners for the antennas and I glued the pipe cleaner on the back of the sucker. For the final touch I glued glittery pompon to the top of each antenna.
This craft is really pretty and can even be used as a decoration while waiting to give out on Valentines Day. Put them in a vase on your kitchen table.
Visit Mom-Stuff for your best resource site for moms. We are busy right now posting Valentine ideas. Come and visit us. If you have a great Valentine ideas share it with us. We love to hear from you. email us at contact@mom-stuff.com
Blog of the Week-Ashleys Craft Room
Today is our last day at the Ashley’s Craft Blog on our Mom-Stuff Blog Tour. The Mom-StuffTeam has really enjoyed visiting Ashleys great blog. She is a great resource for moms with young kids who like crafts. We still have a few spots left on our Mom-Stuff Blog Tour if you want us to highlight your blog let us know. dianne@mom-stuff.com
ScrapbookingYou Warm My Heart
Instructions:-The first thing I do when designing a scrapbook page is choose the pictures I want to use.-The next step is to choose the background paper and contrasting colors that match the pictures.-The next step is the most important step in making a scrap book page. What is the theme you want for your page? What do you want your page to express?-For this page I wanted to make a Valentine page for the mom-stuff web site. I wanted it to use some hearts and borders from the mom-stuff, kids craft project, Valentines Made From Hearts in the Family Fun Section.
The pictures I wanted to use did not have many colors in them so red and white became the dominate colors, with yellow and green as the accent colors. I was lucky enough to find some red paper with white dots. This paper was a close match to the fabric of the dress.
I bordered the pictures in white, using about the same width as the ribbon on the dress.The next step is to design the page (or pages).First decide on the title. I look first at my Cricut Cartridge’s for ideas. I love to use my Cricut because then the colors will match perfectly, because I can make my title out of the same paper I am using on the pages. For this page I used Cricut, Beyond Birthdays. I cut “you warm my heart” on the 2 inch setting.
(Note: when I am designing a page I use some construction paper to cut out my designs from first. This lets me experiment with the size without using my scrapbook paper. I also use the construction paper pieces to design my layout. I place them in different places on my page until I am happy with the placement. I identify the construction paper with the cartridge name and size of the cut to reference for cutting. After you have designed your page you are ready to cut out your pieces.
Cut with Cricut CartridgesCut in white:Beyond Birthdays-you warm my heart-2 inch-cut one.George-daisies -cut four 2 ½ inch, cut two 2 inch and two 1 inch, Heart-cut one 2 inch and two 1 inch.(heart)You-cut one 2 inchCut in red with white dots:Locker Talk-flowers and ribbon-4 inchesCut in green:Stretch Your Imagination-Flower stem- cut one 3 inch and three 4 inch. Cut off the flowers. I used the flowers to crate more color by cutting the loops into a “C” shape and placed them by the flowers.Cut in Yellow: Twelve ¼ inch heart punch.Boarders-I used the scrapes from the Valentine heart project but to make boarders-cut in white-George-nine 1 inch hearts, cut with paper cutter, leaving 1/16 inch edge. Repeat step. Glue on to red dot paper leaving a 1/8 boarder on both top and bottom.Place everything on to your twelve by twelve card stock and make sure you are pleased with your layout. When satisfied with placement, glue in place using scrap book glue.
Options:
Shading:I love to shade some of my cutouts for affect. On this page I shaded the daisies with yellow, the letters, hearts and ribbons in red. The most common way to shade is to use chalks, but I like to use water color pencils. I color around the edge of the paper about 1/16 wide. I can color all of the pieces in the same color. I take a wet Q-tip and blend the color. This is fast, easy, and controllable.Line work:I use sharpie markers to add accents. On this page I used two sizes of pens extra fine and extra, extra fine. I used black to line everything on this page. I lined between the letters and added accent lines to the centers of the flowers. I made stitch lines on both sides of the boarders, and around the ribbon and around the outside edge of the hearts. I also added some detail lines to the flower stems.
Don’t be afraid to try these options. They are easy and fun. They give your cutouts a special look.
We are so grateful to Ashley for sharing her blog with us. Visit Ashley’s Craft Room often and leave her your comments. She has visitors who have made special requests and she has done her best to help them.
Visit Mom-Stuff for your best resource site for moms. We are busy right now posting Valentine ideas. Come and visit us. If you have a great Valentine ideas share it with us. We love to hear from you. email us at contact@mom-stuff.com
Thursday, January 14, 2010
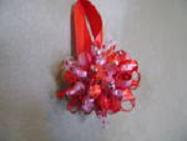
Valentine Flower Ball
Materials:
Silk flowers
Styrofoam craft ball
Low heat glue
Low heat glue gun
Scissors
Fun ribbon in different widths (Valentines colors)
Craft beads
Instructions:
First I would plugged in the glue gun to preheat before you begin.
Cut the flower stems off close to the flowers.
I put a spot of glue on the Styrofoam ball then my son would place a flower where I put the glue. We did this half way around the ball.
Then we glued 8 inch piece of satin ridden to the top of the ball folding it in half forming the loop for the hanger.
We glued the flowers around the ribbon loop and covered the rest of the ball.
We now made small 3-inch loops with the fun valentines ribbon and craft beads.
These we place in-between the Flowers to hide the foam ball.
This are great girl friend valentine gifts
Wednesday, January 13, 2010
Valentine Candy Ball
Candy Kisses
Styrofoam craft ball
Low heat glue
Low heat glue gun
Scissors
Fun ridden indifferent widths (Valentines colors)
Craft beads
The first thing that I did was get my 4 year old son to come help me.
I plug in the glue gun.
I had him pull all of the Hershey tags out of the kisses.
I put a spot of glue on the Styrofoam ball then he would place a kiss where I put the glue. We did this half way around the ball.
Then we glued 8inch piece of satin ridden to the top of the ball folding it in half forming the loop for the hanger.
We glued the kisses around the ribbon loop.
We now made small 3-inch loops with the fun valentines ribbon and craft beads.
These are place in-between the Hershey Kisses to hide the foam ball.
Tuesday, January 12, 2010
Thanks to Mom-Stuff Blog Tour
Here is the article they wrote about me on the Mom-Stuff Blog Tour
The Mom-Stuff Team is having lots of fun on the Mom-Stuff Blog Tour. This week we will be highlighting one of our favorite Craft Blogs- Ashley’s Craft Room
Meet Ashley. Ashley is the mother of two young boys and the favorite Aunt to two young girls. She is always making crafts with them. Ashley is one of the Mom-Team Experts. She posts for kid crafts on Mom-Stuff to share with other moms. We want to thanks her for sharing her talents. Visit her site and tell her “thanks.” We will be sharing some of our favorite posts from her site. We will give a gift to the person who makes the most comments and tweets so come follow our Mom-Stuff Blog Tour. Join the fin.
Thursday, January 7, 2010
Valentine Suckers
Suckers Pipe Cleaners
Art Foam
Pompoms
google eyes
Bunny Valentine Some BUNNY loves you (text for bunny tag)
Wrap the sucker with a white pipe cleaner. Uses a pink pompom, for the tail. Use four white pompoms for the feet. Use four pompoms for the head. Use a pink and white pipe cleaner for the ears. Use a white pompom for the nose. Glue on two goggle eyes.
Bug Valentine Be my love BUG
Take two pipe cleaners and wrap them around the base of the sucker. Form the four ends into legs. Use a pompom for the nose. Glue on two goggle eyes. Use a small piece of pipe cleaner to make antennas'. Cut out the wings from art foam. Pattern page follows instructions. Punch holes from foam and glue them to wings. Glue wings on top of the sucker.
Lion Valentine I am not LION, I want you to be mine. (text for lion tag)
Cover the sucker and one inch of the stick with a yellow pipe cleaner. Twist a yellow and orange pipe cleaner together for legs. Cut mane out of orange art foam. Pattern page follows instructions. Glue three yellow pompoms on to the mane for the head Use a yellow pompom for the nose and two pipe ½ inch cleaners folded in half for the ears.
Dinosaur Valentine You are my friendasaurus
Cover the sucker and one inch of the stick with a green pipe cleaner. Twist a yellow and green pipe cleaner together for the legs. Fold a three inch pipe cleaner in half and twist it for the tail. Glue two green pompoms to each side of a yellow foam triangle for the head. Pattern page follow instructions. Use a yellow pompom for the nose. Glue on two goggle eyes. Glue three triangles on the back. Punch some yellow foam with a hole punch and glue on to the back.
Snake Valentine Don't be a SNAKE in the grass, Be mine (text for snake tag)
Cover the sucker and the stick with a green pipe cleaner. Fold a six inch green pipe cleaner in half. Twist it together and add to the stick to make the tail. Cut a red pipe cleaner at 2 inches. Fold in half to make the tongue. Cut some orange stripes and add to the back. Glue on two goggle eyes.
Butterfly Valentine Come FLY with me (text for butterfly tag)
Cover sucker and ½ inch of stick with pink and purple pipe cleaners. Glue on two purple pompoms for the head. Use one pink pompom for the nose. Glue on goggle eyes. Cut wings from pink and purple art foam. Pattern Page follows instructions.
Valentinedino Don't Brachiosaurus my heart, Be my Valentine (text for dino tag)
Cover the sicker and stick with a dark blue pipe cleaner. Cut 4 inch pipe cleaner in both dark and light blue. Twist together to make arms. Cut 6 inch dark blue pipe cleaner for other leg. Fold in half and twist together add to body. Repeat last step and add to body for tail. Wrap legs, tails and body with light blue. Make belly from white pipe cleaner by folding at one inch and winding the pipe cleaner around the one inch piece. Add triangles to head, back and tail. Pattern page follows instructions. Add a white pompom for nose. Glue on two goggle eyes.
Other ideas for sucker Valentines
Have a BEARy happy valentine's day
Bee my Valentine
Lets MONKEY around
If you have a Cricut, there are several cartridges that come with a heart. I used the George Cartridge, with the 2 1/2 inch size. I used a ¼ hole punch to punch two holes through the tag. I threaded it on the sucker stick when possible or I tied it on with curly ribbon. Patterns http://www.mom-stuff.com/public/132.cfm
Valentine Animals Made From Hearts
Materials:
Card stock-different colors- I used four different colors.
Glue
Colored pens or crayons.
Paper to glue animals onto to make a picture or a cardInstructions:
Cut hearts from several colors of card stock.
I cut hearts ranging in size from 1\4 to 3 inches.
I used the Cricut, Plantin SchoolBook Cartridge.
Let the kids crate animals. Have a sheet of paper folded in half so children can make a Valentine for someone they want to give it to.
Glue on small goggle eyes.
Make your own Valentines.
Follow the same steps.
I bought some cards and envelopes from the local craft store. I bought some in pink and white.I also used the scrapes from the hearts to trim the cards (and to boarded the Valentine scrapbook pages.)
I used some other cut outs from my Cricut Cartridge.
I love to shade some of my cutouts for affect. The most common way to shade is to use chalks, but I like to use water color pencils. I color around the edge of the paper about 1/16 wide. I then take a wet Q-tip and blend the color. This is fast, easy, and controllable. I use extra fine sharpie markers to add accents and text.
Valentine Scrapbooking Page
Scrapbooking
You Warm My Heart
Instructions:
-The first thing I do when designing a scrapbook page is choose the pictures I want to use.
-The next step is to choose the background paper and contrasting colors that match the pictures.
-The next step is the most important step in making a scrap book page. What is the theme you want for your page? What do you want your page to express?
-For this page I wanted to make a Valentine page for the mom-stuff web site. I wanted it to use some hearts and borders from the mom-stuff, kids craft project, Valentines Made From Hearts in the Family Fun Section.
The pictures I wanted to use did not have many colors in them so red and white became the dominate colors, with yellow and green as the accent colors. I was lucky enough to find some red paper with white dots. This paper was a close match to the fabric of the dress.
I bordered the pictures in white, using about the same width as the ribbon on the dress.
The next step is to design the page (or pages).
First decide on the title. I look first at my Cricut Cartridge's for ideas. I love to use my Cricut because then the colors will match perfectly, because I can make my title out of the same paper I am using on the pages. For this page I used Cricut, Beyond Birthdays. I cut "you warm my heart" on the 2 inch setting.
(Note: when I am designing a page I use some construction paper to cut out my designs from first. This lets me experiment with the size without using my scrapbook paper. I also use the construction paper pieces to design my layout. I place them in different places on my page until I am happy with the placement. I identify the construction paper with the cartridge name and size of the cut to reference for cutting. After you have designed your page you are ready to cut out your pieces.
Cut with Cricut Cartridges
Cut in white:
Beyond Birthdays-you warm my heart-2 inch-cut one.
George-daisies -cut four 2 ½ inch, cut two 2 inch and two 1 inch, Heart-cut one 2 inch and two 1 inch.
(heart)You-cut one 2 inch
Cut in red with white dots:
Locker Talk-flowers and ribbon-4 inches
Cut in green:
Stretch Your Imagination-Flower stem- cut one 3 inch and three 4 inch. Cut off the flowers. I used the flowers to crate more color by cutting the loops into a "C" shape and placed them by the flowers.
Cut in Yellow: Twelve ¼ inch heart punch.
Boarders-I used the scrapes from the Valentine heart project but to make boarders-cut in white-George-nine 1 inch hearts, cut with paper cutter, leaving 1/16 inch edge. Repeat step. Glue on to red dot paper leaving a 1/8 boarder on both top and bottom.
Place everything on to your twelve by twelve card stock and make sure you are pleased with your layout. When satisfied with placement, glue in place using scrap book glue.
Options:
Shading:
I love to shade some of my cutouts for affect. On this page I shaded the daisies with yellow, the letters, hearts and ribbons in red. The most common way to shade is to use chalks, but I like to use water color pencils. I color around the edge of the paper about 1/16 wide. I can color all of the pieces in the same color. I take a wet Q-tip and blend the color. This is fast, easy, and controllable.
Line work:
I use sharpie markers to add accents. On this page I used two sizes of pens extra fine and extra, extra fine. I used black to line everything on this page. I lined between the letters and added accent lines to the centers of the flowers. I made stitch lines on both sides of the boarders, and around the ribbon and around the outside edge of the hearts. I also added some detail lines to the flower stems.
Don't be afraid to try these options. They are easy and fun. They give your cutouts a special look.